Explore Stylish Designs A CSS Page Showcase Journey
Elevate your web design with our CSS styles. Explore responsive layouts, beautiful typography, and modern visual enhancements effortlessly.
Dear learners, Are you interested in assessing your progress?
Request your mentor to give you access and start your Test.
“Dive into the world of web design with our beginner-friendly CSS course. Learn the fundamentals of styling, layout, and responsiveness. Build a solid foundation for creating visually appealing and modern websites. Start your coding journey today!”
Learn CSS Advanced Basic Styles
1. CSS # id selector :
In CSS, the # (hash or pound) symbol is used to define an ID selector. An ID selector is used to select and style a specific HTML element based on its unique ID attribute.
#yourID {
/* Styles go here */
}
2. CSS Class Selector :
the class selector is denoted by a period (dot) followed by the class name. Class selectors are used to select and style HTML elements that have a specific class attribute.
className should be replaced with the actual class name you want to target.
HTML

<!DOCTYPE html>
<html>
<head>
<title>Eligo CS</title>
<meta charset="utf-8"name="viewport"content="width=device-width, initial-scale=1.0" />
<style>
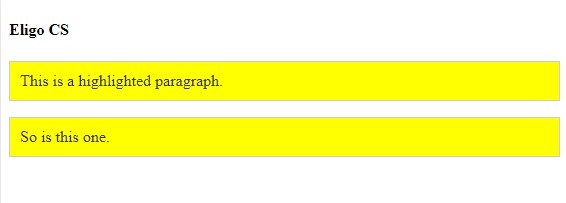
.highlight {
background-color: yellow;
color: #333;
padding: 10px;
border: 1px solid #ccc;
}
</style>
</head>
<body>
<h4>Eligo CS</h4>
<p class="highlight">This is a highlighted paragraph.</p>
<p class="highlight">So is this one.</p>
</body>
</html>
HTML
2. Pseudo- classes :
pseudo-classes are used to select and style elements based on their state or position in the document tree. Pseudo-classes are denoted by a colon (:) followed by the name of the pseudo-class.
:hover – Hover Pseudo-class:
- Selects and styles an element when the user hovers over it.
:active – Active Pseudo-class:
- Selects and styles an element when it is being activated (clicked).
:focus – Focus Pseudo-class:
- Selects and styles an element when it has keyboard focus.
:first-child – First Child Pseudo-class:
- Selects and styles the first child element of its parent.
:nth-child(n) – nth Child Pseudo-class:
- Selects and styles the nth child element of its parent. Replace
nwith a number or an expression.
:nth-of-type(n) – nth of Type Pseudo-class:
- Selects and styles the nth child of its type within its parent. Similar to
:nth-childbut only considers elements of the same type.
:not(selector) – Not Pseudo-class:
- Selects and styles elements that do not match the specified selector.
HTML
<!DOCTYPE html>
<html lang="en">
<head>
  <meta charset="UTF-8">
  <meta name="viewport" content="width=device-width, initial-scale=1.0">
  <style>
    /* Default link style */
    a:link {
      color: blue;
      text-decoration: none;
    }

    /* Visited link style */
    a:visited {
      color: purple;
    }

    /* Hovered link style */
    a:hover {
      color: red;
      text-decoration: underline;
    }

    /* Active link style (when clicked) */
    a:active {
      color: green;
    }

    /* Additional styling for demonstration purposes */
    body {
      font-family: Arial, sans-serif;
      text-align: center;
    }
  </style>
  <title>Pseudo-classes Example</title>
</head>
<body>
  <h1>Link Styling with Pseudo-classes</h1>

  <p>Click the link below to see the different styles:</p>

  <!-- The link -->
  <a href="https://example.com" target="_blank">Visit Example.com</a>
</body>
</html>
HTML
Pseudo-classes Example
Link Styling with Pseudo-classes
Click the link below to see the different styles:
Visit Example.com
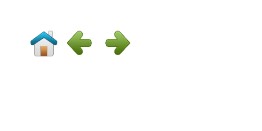
Creating Image Sprites :
Define a Sprite Class:
- Create a CSS class for the sprite. This class will be used to set the common background properties for elements using the sprite.
Specify Image Areas:
- For each individual image in the sprite, specify the background position to show the relevant area.
Apply the Classes in HTML:
- Apply the sprite classes to HTML elements by adding the appropriate class.
HTML
<!DOCTYPE html>
<html>
<head>
<style>
#navlist {
  position: relative;
}

#navlist li {
  margin: 0;
  padding: 0;
  list-style: none;
  position: absolute;
  top: 0;
}

#navlist li, #navlist a {
  height: 44px;
  display: block;
}

#home {
  left: 0px;
  width: 46px;
  background: url('../Downloads/img_navsprites_hover.gif') 0 0;
}

#prev {
  left: 63px;
  width: 43px;
  background: url('../Downloads/img_navsprites_hover.gif') -47px 0;
}

#next {
  left: 129px;
  width: 43px;
  background: url('../Downloads/img_navsprites_hover.gif') -91px 0;
}

#home a:hover {
  background: url('../Downloads/img_navsprites_hover.gif') 0 -45px;
}

#prev a:hover {
  background: url('../Downloads/img_navsprites_hover.gif') -47px -45px;
}

#next a:hover {
  background: url('../Downloads/img_navsprites_hover.gif') -91px -45px;
}
</style>
</head>
<body>

<ul id="navlist">
  <li id="home"><a href="default.asp"></a></li>
  <li id="prev"><a href="css_intro.asp"></a></li>
  <li id="next"><a href="css_syntax.asp"></a></li>
</ul>

</body>
</html>
HTML
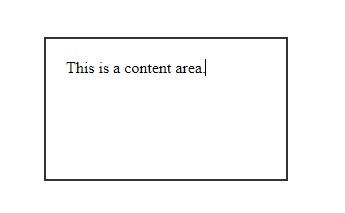
- Content Area:
- Represents the actual content of the element, such as text, images, or other media.
- Dimensions can be set using properties like
widthandheight.
- Padding Area:
- The space between the content area and the element’s border.
- Can be set using properties like
padding-top,padding-right,padding-bottom, andpadding-left. - You can also use the shorthand property
paddingto set all paddings at once.
- Border Area:
- The border surrounds the padding area and content.
- It can be styled using properties like
border-width,border-style, andborder-color. - Shorthand property
bordercan be used to set all border properties at once.
- The space outside the element’s border.
- Provides separation between adjacent elements.
- Can be set using properties like
margin-top,margin-right,margin-bottom, andmargin-left. - Shorthand property
margincan be used to set all margins at once.
HTML
<!DOCTYPE html>
<html lang="en">
<head>
  <meta charset="UTF-8">
  <meta name="viewport" content="width=device-width, initial-scale=1.0">
  <style>
    /* Apply box model to the div */
    div {
      width: 200px;
      height: 100px;
      padding: 20px;
      border: 2px solid #333;
      margin: 10px;
    }
  </style>
  <title>Box Model Example</title>
</head>
<body>

  <!-- A div element with applied box model -->
  <div>
    This is a content area.
  </div>

</body>
</html>
HTML
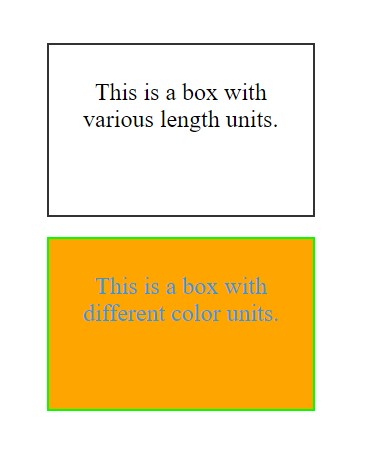
3. Apply CSS Unit :
CSS supports various units for specifying measurements and sizes. These units can be broadly categorized into two types: absolute units and relative units.
- Length Units:
px(pixels): Fixed-size units.%(percentage): Relative to the parent element’s size.em: Relative to the font-size of the element or the parent element.rem: Relative to the font-size of the root element (html).
- Color Units:
#3498db: Hexadecimal color code.rgb(255, 165, 0): RGB color.hsl(120, 100%, 50%): HSL color.
HTML
<!DOCTYPE html>
<html lang="en">
<head>
  <meta charset="UTF-8">
  <meta name="viewport" content="width=device-width, initial-scale=1.0">
  <style>
    body {
      font-size: 16px; /* Set base font size for better understanding */
    }

    /* Length Units */
    div {
      width: 200px; /* Pixels */
      height: 150px;
      margin: 20px;
      padding: 10px;

      width: 50%; /* Percentage of the parent element's width */
      font-size: 1.5em; /* Relative to the parent element's font size */
      border: 2px solid #333;
    }

    /* Color Units */
    .color-example {
      color: #3498db; /* Hexadecimal color */
      background-color: rgb(255, 165, 0); /* RGB color */
      border-color: hsl(120, 100%, 50%); /* HSL color */
    }
  </style>
  <title>CSS Units Example</title>
</head>
<body>

  <!-- Length Units Example -->
  <div>
    <p>This is a box with various length units.</p>
  </div>

  <!-- Color Units Example -->
  <div class="color-example">
    <p>This is a box with different color units.</p>
  </div>

</body>
</html>
HTML
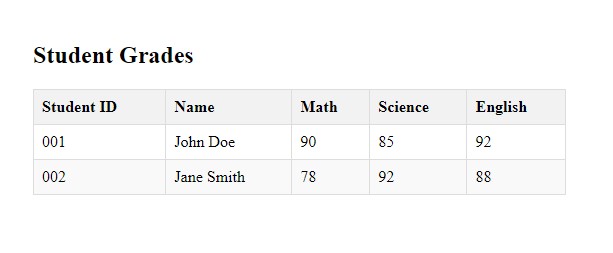
CSS Table style :
Table Styling:
width: 100%;: Makes the table occupy the full width of its container.border-collapse: collapse;: Collapses the borders into a single border, eliminating the spacing between cells.margin-bottom: 20px;: Adds spacing below the table.
Table Header and Data Cells:
border: 1px solid #ddd;: Adds a 1-pixel solid border to cells.padding: 8px;: Provides space inside cells.text-align: left;: Aligns text to the left.
Table Header Styles:
background-color: #f2f2f2;: Adds a light background color to the table header.
Alternating Row Colors:
tr:nth-child(even): Selects even-numbered rows.background-color: #f9f9f9;: Adds a different background color to alternating rows.
HTML
<!DOCTYPE html>
<html lang="en">
<head>
  <meta charset="UTF-8">
  <meta name="viewport" content="width=device-width, initial-scale=1.0">
  <style>
    /* Basic styling for the table */
    table {
      width: 100%;
      border-collapse: collapse;
      margin-bottom: 20px;
    }

    /* Styling for table header */
    th, td {
      border: 1px solid #ddd;
      padding: 8px;
      text-align: left;
    }

    th {
      background-color: #f2f2f2;
    }

    /* Alternating row colors */
    tr:nth-child(even) {
      background-color: #f9f9f9;
    }
  </style>
  <title>CSS Tables Example</title>
</head>
<body>

  <h2>Student Grades</h2>

  <!-- Table structure -->
  <table>
    <thead>
      <tr>
        <th>Student ID</th>
        <th>Name</th>
        <th>Math</th>
        <th>Science</th>
        <th>English</th>
      </tr>
    </thead>
    <tbody>
      <tr>
        <td>001</td>
        <td>John Doe</td>
        <td>90</td>
        <td>85</td>
        <td>92</td>
      </tr>
      <tr>
        <td>002</td>
        <td>Jane Smith</td>
        <td>78</td>
        <td>92</td>
        <td>88</td>
      </tr>
      <!-- Add more rows as needed -->
    </tbody>
  </table>

</body>
</html>
HTML
Dear learners, Are you interested in assessing your progress?
Request your mentor to give you access and start your test.