Explore advanced beginner courses in HTML for a deeper understanding. Learn dynamic content, forms, CSS integration, and responsive design.
Start Your Test Now Dear learners, Are you interested in assessing your progress? Request your mentor to give you access and start your test.
Welcome to the next level of HTML proficiency! As an advanced beginner, you’ve conquered the basics; now it’s time to elevate your skills. Certainly! Intermediate HTML courses typically cover more advanced topics and features of HTML. Here’s a breakdown of the content you might find in such a course
Learn More About HTML Tags
1. Divine Separation :
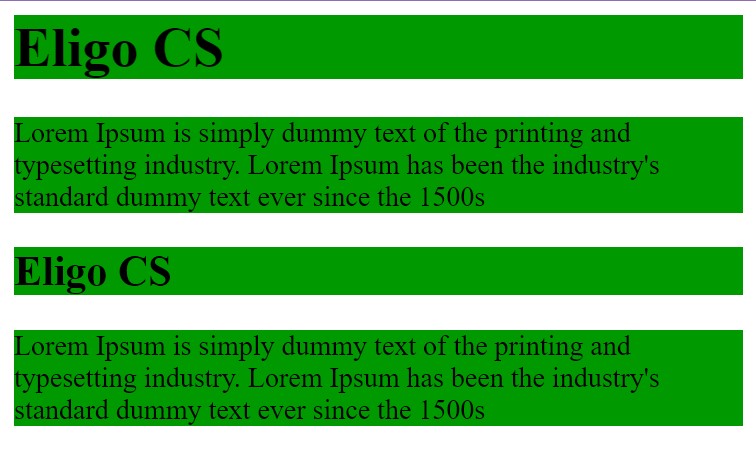
The <div> tag is known as the Division tag. The div tag is used in HTML to make divisions of content in the web page like (text, images, header, footer, navigation bar, etc). Div tag has both open (<div>) and closing (</div>) tags and it is mandatory to close the tag.
HTML
<html>
<head>
    <title> Division Tag</title>
    <style type=text/css>
        p {
            background-color: 009900;
        }
 h1, h2 {
            background-color: 009900;
        }
    </style>
</head>
<body>
<div>
    <h1> Eligo CS</h1>
        <p>  Lorem Ipsum is simply dummy text of the printing and typesetting industry. Lorem Ipsum has been the industry's standard dummy text ever since the 1500s </p> </div>
   <div>  <h2> Eligo CS</h2>
    <p>  Lorem Ipsum is simply dummy text of the printing and typesetting industry. Lorem Ipsum has been the industry's standard dummy text ever since the 1500s </p> </div>
</body>
</html>
HTML
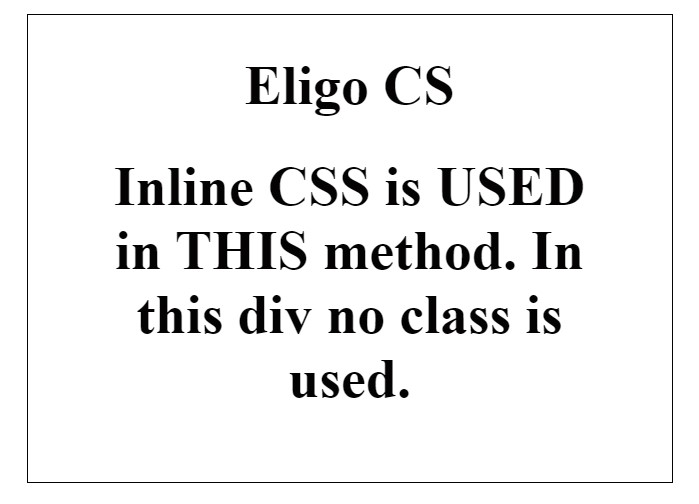
Deep div into div:
We can directly use CSS in div also. This method does not require class. Div in HTML coding is used as a container tag also because it is the one that can contain all other tags.
HTML
<!DOCTYPE html>
<html>
<head>
    <title> ECS</title>
</head>
<body>
    <center>
        <div>
            <caption>
                <h1> Eligo CS</h1>
            </caption>
<div>
<h1> Inline CSS is USED in THIS method.
                In this div no class is used.
            </h1>
</div>
        </div>

    </center>
</body>
</html>
HTML
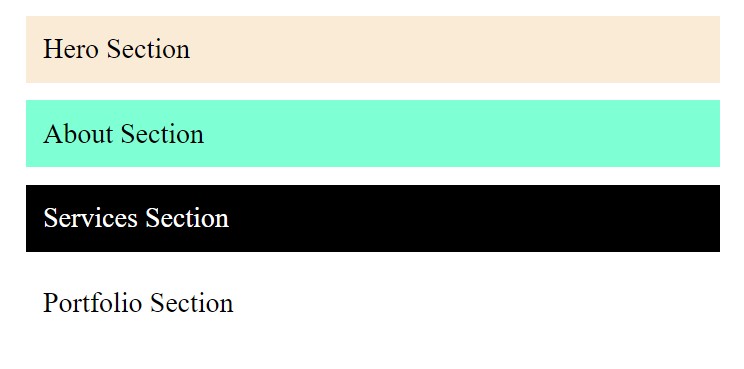
6. Multi div for body :
The Div is the most usable tag in web development because it helps us to separate data in the web page and we can create a particular section for particular data or function in the web pages.
The HTML <span> tag is a generic inline container for inline elements and content. It is used to group elements for styling purposes (by using the class or id attributes), A better way to use it when no other semantic element is available.
The <header> tag in HTML is used to define the header for a document or a section as it contains the information related to the title and heading of the related content.
The <footer> tag in HTML is used to define the footer of an HTML document. This section contains the footer information (author information, copyright information, carriers, etc). The contact details contained within a website’s footer should be enclosed within an <address> tag.
HTML
<!DOCTYPE html>
<html>
<body>
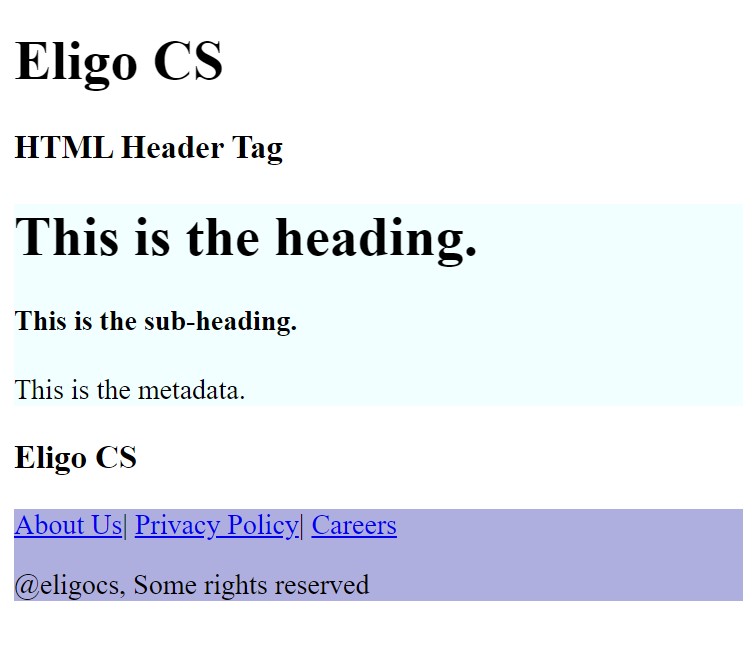
<h1> Eligo CS</h1>
<h3> HTML Header Tag</h3>
< !--HTML header tag starts here-->
<header style="background-color: azure;">
<h1> This is the heading.</h1>
<h4> This is the sub-heading.</h4>
<p> This is the metadata.</p>
</header>
<!--HTML header tag ends here-->
<div class="center">
<h3> Eligo CS </h3>
< /div>
<footer style="background-color: blue;">
<a href=”#”> About Us</a> |
<a href="https://eligocs.com/privacy-policy/"> Privacy Policy</a> |
<a href="https://www.eligocs.com/careers/"> Careers</a>
<p> @eligocs, Some rights reserved</p>
</footer>
</body>
</html>
HTML
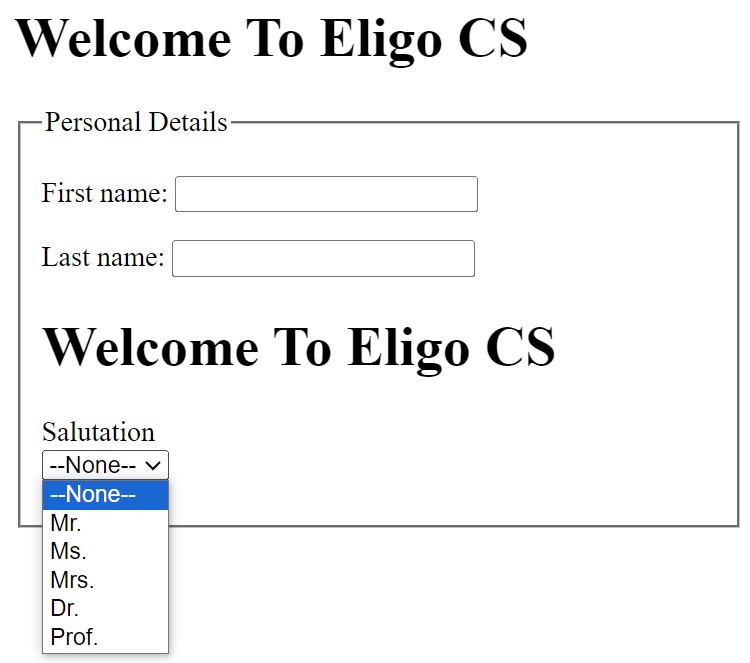
HTML Form
An HTML form is a section of a document which contains controls such as text fields, password fields, checkboxes, radio buttons, submit button, menus etc.
An HTML form facilitates the user to enter data that is to be sent to the server for processing such as name, email address, password, phone number, etc. .
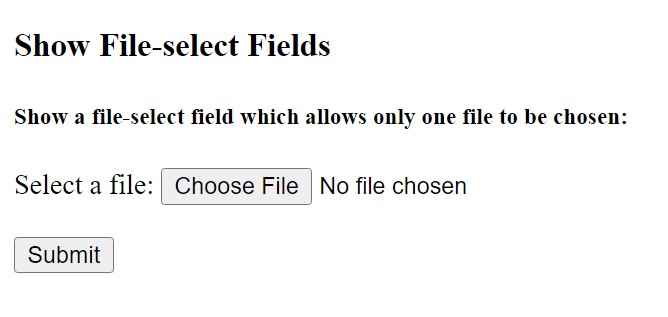
When you want to get the data from users in the form of a document, image, or file. HTML allows you to add the file upload functionality to your website by adding a file upload button to your webpage with the help of the <input> tag.
HTML
<!DOCTYPE html>
<html>

<body>
    <h3> Show File-select Fields</h3>

    <h5>
        Show a file-select field which allows
        only one file to be chosen:
    </h5>

    <form action="/#.php"
        enctype="multipart/form-data">

        <label for="myfile"> Select a file:</label>
        <input type="file" id="myfile" name="myfile" />
        <br/> <br/>
        <input type="submit" />
    </form>
</body>

</html>
HTML
Dear learners, Are you interested in assessing your progress? Request your mentor to give you access and start your Test.